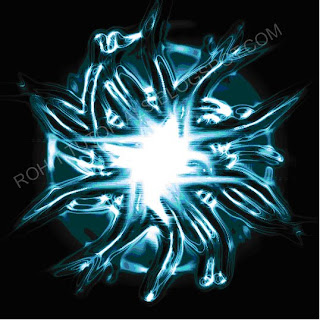
Step1: Make a new file. 600 x 600 pixels, and make the background transparent. Click OK. Click 'D' on your keyboard. With your Paint Bucket Tool, fill your background with black.
Step2: Filter->Render->Lens Flare. Align your lens flare near the center of your screen, and make the Brightness 100%, and use the 50-300mm Zoom type lens flare.
Step3: Filter->Liquify. Make the brush size 22, and make the brush pressure 65. Using your brush, click and drag from the center of your lens flare outward so you can get a nice tentacle-looking smudge. Do this a few more times so you have a total of 6 - 8 tentacles that are a nice distance apart (I used 7).
Step4: Layer->Duplicate Layer. Edit->Transform->Flip Horizontal. Edit->Transform->Flip Vertical. In your Layers Palette (by default, should be the palette at the bottom right hand side of your screen), set the top-most layer's blend mode on Lighten. To do this, click on the layer that's first in the order, and where it says, "Blend Mode" right above that, click on the upside down triangle and set it on Lighten.
Step5: While the top-most layer in your Layers Palette is still selected, go to Filter->Liquify. This time, make about 3 more evenly spread-out tentacles.
Step6: Ctrl + E. Layer->Duplicate Layer. Edit->Transform->Scale. Near the top toolbar where you see, "W:100% ... H:100%", set those both on 75%. Apply the transformation settings. Edit->Transform->Flip 90º CW.
Step7: Set the top-most layer's blend mode to Lighten. Ctrl + E.
Step8: Layer->Duplicate Layer. Filter->Stylize->Wind. Method= Wind. Direction= from the right. Filter->Stylize->Wind. Method= Wind. Direction= from the left.
Here's what yours should look like:
Step9: Select Layer 1 in your layers palette (it's the bottom layer in the order.) Layer->Duplicate Layer. Now, in your layers palette, click and drag Layer 1 Copy 2 so it's above Layer 1 copy.
Step10: Filter->Artistic->Plastic Wrap. Highlight Strength=20 ... Detail= 7... Smoothness= 5. Click OK. Set this layers blend mode to Overlay.Here's what yours should look like:
Step11: Click on Layer 1 in the layers palette again and go to Layer->Duplicate Layer. Click and drag Layer 1 copy 3 so that it's at the very top of your layer order in your layers palette. (it should be above Layer 1 copy 2.)
Step12: Filter->Sketch->Chrome. Detail=4 ... Smoothness=7.
Step13: Click OK. Make the top-most layer's (should be "Layer 1 copy 3") blend mode to Lighten. Step14: Layer->Flatten Image. Ctrl + U. Check Colorize. Make the Hue 193 and make the Saturation anywhere from 25 - 70. Click OK.


0 comments:
Post a Comment