Step 1:
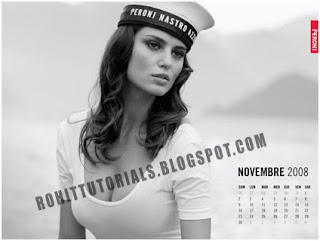
First, save the photo below that we will use for this lesson as background.
 Step 2:
Create a new flash document. Press Ctrl+J key on the keyboard (Document Properties) and set the width of your document to 420 pixels and the height to 315 pixels. Select any color as background color. Set your Flash movie's frame rate to 33 and click ok.
Step 3:
Call the current layer photo. Double-click on its default name (Layer 1) to change it. Press Enter once you have typed in the new name!
Step 4:
Choose now File > Import > Import to stage (Ctrl+R) and import a photo that you just saved in step 1 into a flash stage. While the photo is still selected, go to the Align Panel (Ctrl+K) and do the following:
1. Make sure that the Align/Distribute to Stage button is turned on,
2. Click on the Align horizontal center button and
3. Click the Align vertical center button.
 Step 5:
While the photo is still selected, hit F8 key (Convert to Symbol) to convert it into a Movie Clip Symbol.
 Step 6:
Select frame 65 and hit F6 key.
Step 7:
Go back on the first frame, select the Selection Tool (V) and click once on the photo to select it.Then, go to the Properties Panel (Ctrl+F3) below the stage. Select Filters tab from the left side. Click after that on the plus icon and select the Blur filter. Make the adjustments as follows:
 Step 8:
Right-click anywhere on the gray area between frame 1 and 65 on the timeline and choose Create Motion Tween from the menu that appears.
Step 9:
Create a new layer above the layer photo and name it mask.
Step 10:
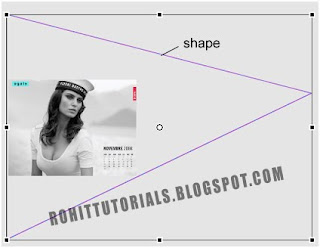
Select mask layer and draw a shape and place it on the position like it is shown on the picture below! Step 11:
Select now frame 30 and hit F6 key. While you're still on frame 30, make the shape like it is shown on the picture below!
Step 12:
Select frame 65 and hit F6 key. While you're still on frame 65, make a shape like it is shown on the picture below!

Step 13:
Right-click anywhere on the gray area between frame 1 and 30 and frame 30 and 65 on the timeline and choose Create Shape Tween from the menu that appears.
Step 14:
Select now mask layer and convert it to a mask by right-clicking on the mask layer and selecting Mask. See the picture below.


0 comments:
Post a Comment