STEP 1
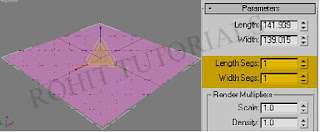
Create a Plane in the center of the scene by going through Create>Geometry>Plane. Access the Modify tab and set the Length and Width Segs to 1, then rescale the plane until it fills the whole of the Perspective view.
 STEP 2
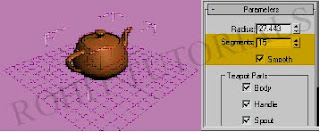
Create a Teapot in the center of the screen, then access the Modify tab and set the Segments in the Parameter rollout to 15 to give the teapot a more detailed profile and a smoother surface.
 STEP 3
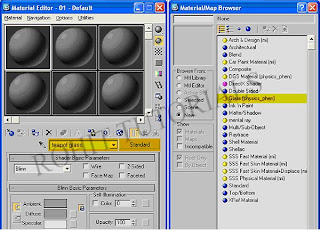
We will start off with the teapot material. Open the Material Editor, select an empty slot and change the material to Glass (physics_phen) from the Material/Map Browser window, then rename it to teapot glass. Glass is one of the materials that create light caustics in real life. Apply this material to teapot01.
 STEP 4
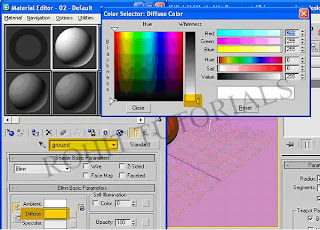
We will now create the material for the plane. Select another empty slot, rename it to ground, and change its color to white by changing its diffuse color, and then apply it to plane01.
 STEP 5
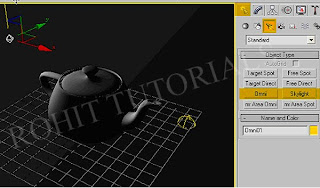
 Go through Create>Lights>Object Type and add Skylight to simulate daylight. Follow that by adding an Omni light to create light rays that would generate the caustics on the plane when it passes through the glass teapot.
Note: The position of the Skylight does not matter for this effect, but the same could not be said for the Omni light. You have to position the Omni light opposite of the location at which you wish your caustics to be cast.
 STEP 6
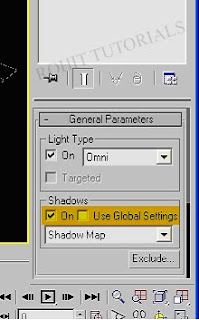
We are now going to enable shadows for the omni light to cast the shadows of the teapot on the floor. While omni light is still selected, access the Modify tab, and activate the On option under the Shadow section of the General Parameters rollout.
 STEP 7
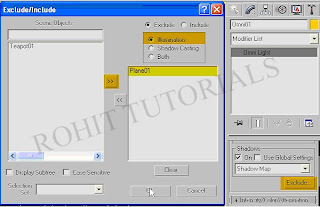
In order to avoid the overburning of the image by light, we will have to exclude the illumination of plane01 from omni light. Click on Exclude under the Shadow options, select Plane01 from the included list and move it to the other list.
 STEP 8
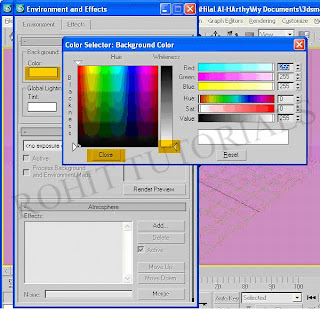
Go through Rendering>Environment (or press 8 in your keyboard) to open up the Environment and Effects window. While still on the Environment tab, set the background Color to white. This would help brighten up the scene and would make the glass reflection appear white instead of black.
 STEP 9
Go through Rendering>Render (or press 10 in your keyboard) to open up the Render Scene options window. Enable Caustics under the Indirect Illumination tab on the Caustics and Global Illumination (GI) rollout. This lets the Mental Ray render engine know that we have caustics enabled and that it should be calculated during rendering time.
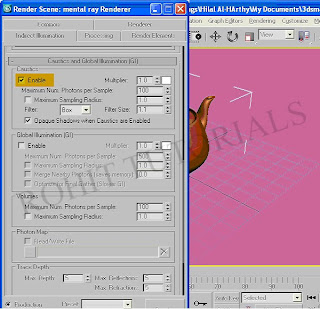 STEP 10
Rendering at this time generates a warning, this is because there isn't an object on the scene that generates a caustic. We will have to manually enable the generation of caustics by the teapot. We'll do that next.
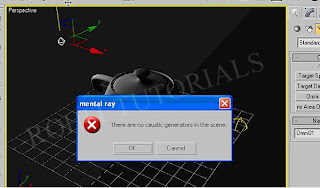 STEP 11
Right click the teapot01 object on the scene and open up the Properties settings. Head to Mental Ray tab and enable the Generate Caustics option and disable Receive Caustics option as illustrated below.
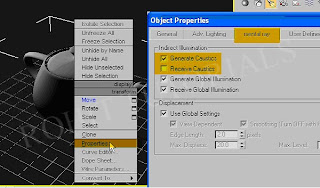 STEP 12
 We need to enable the Final Gather and Global Illumination (GI) options to include the deflected ray-lights from teapot01 and plane01 in the calculation process of the final render. Both could be found in the Render Scene window, under Indirect Illumination tab.
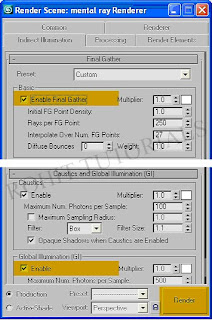
That should do it, hit render to see your cool looking caustics!


0 comments:
Post a Comment